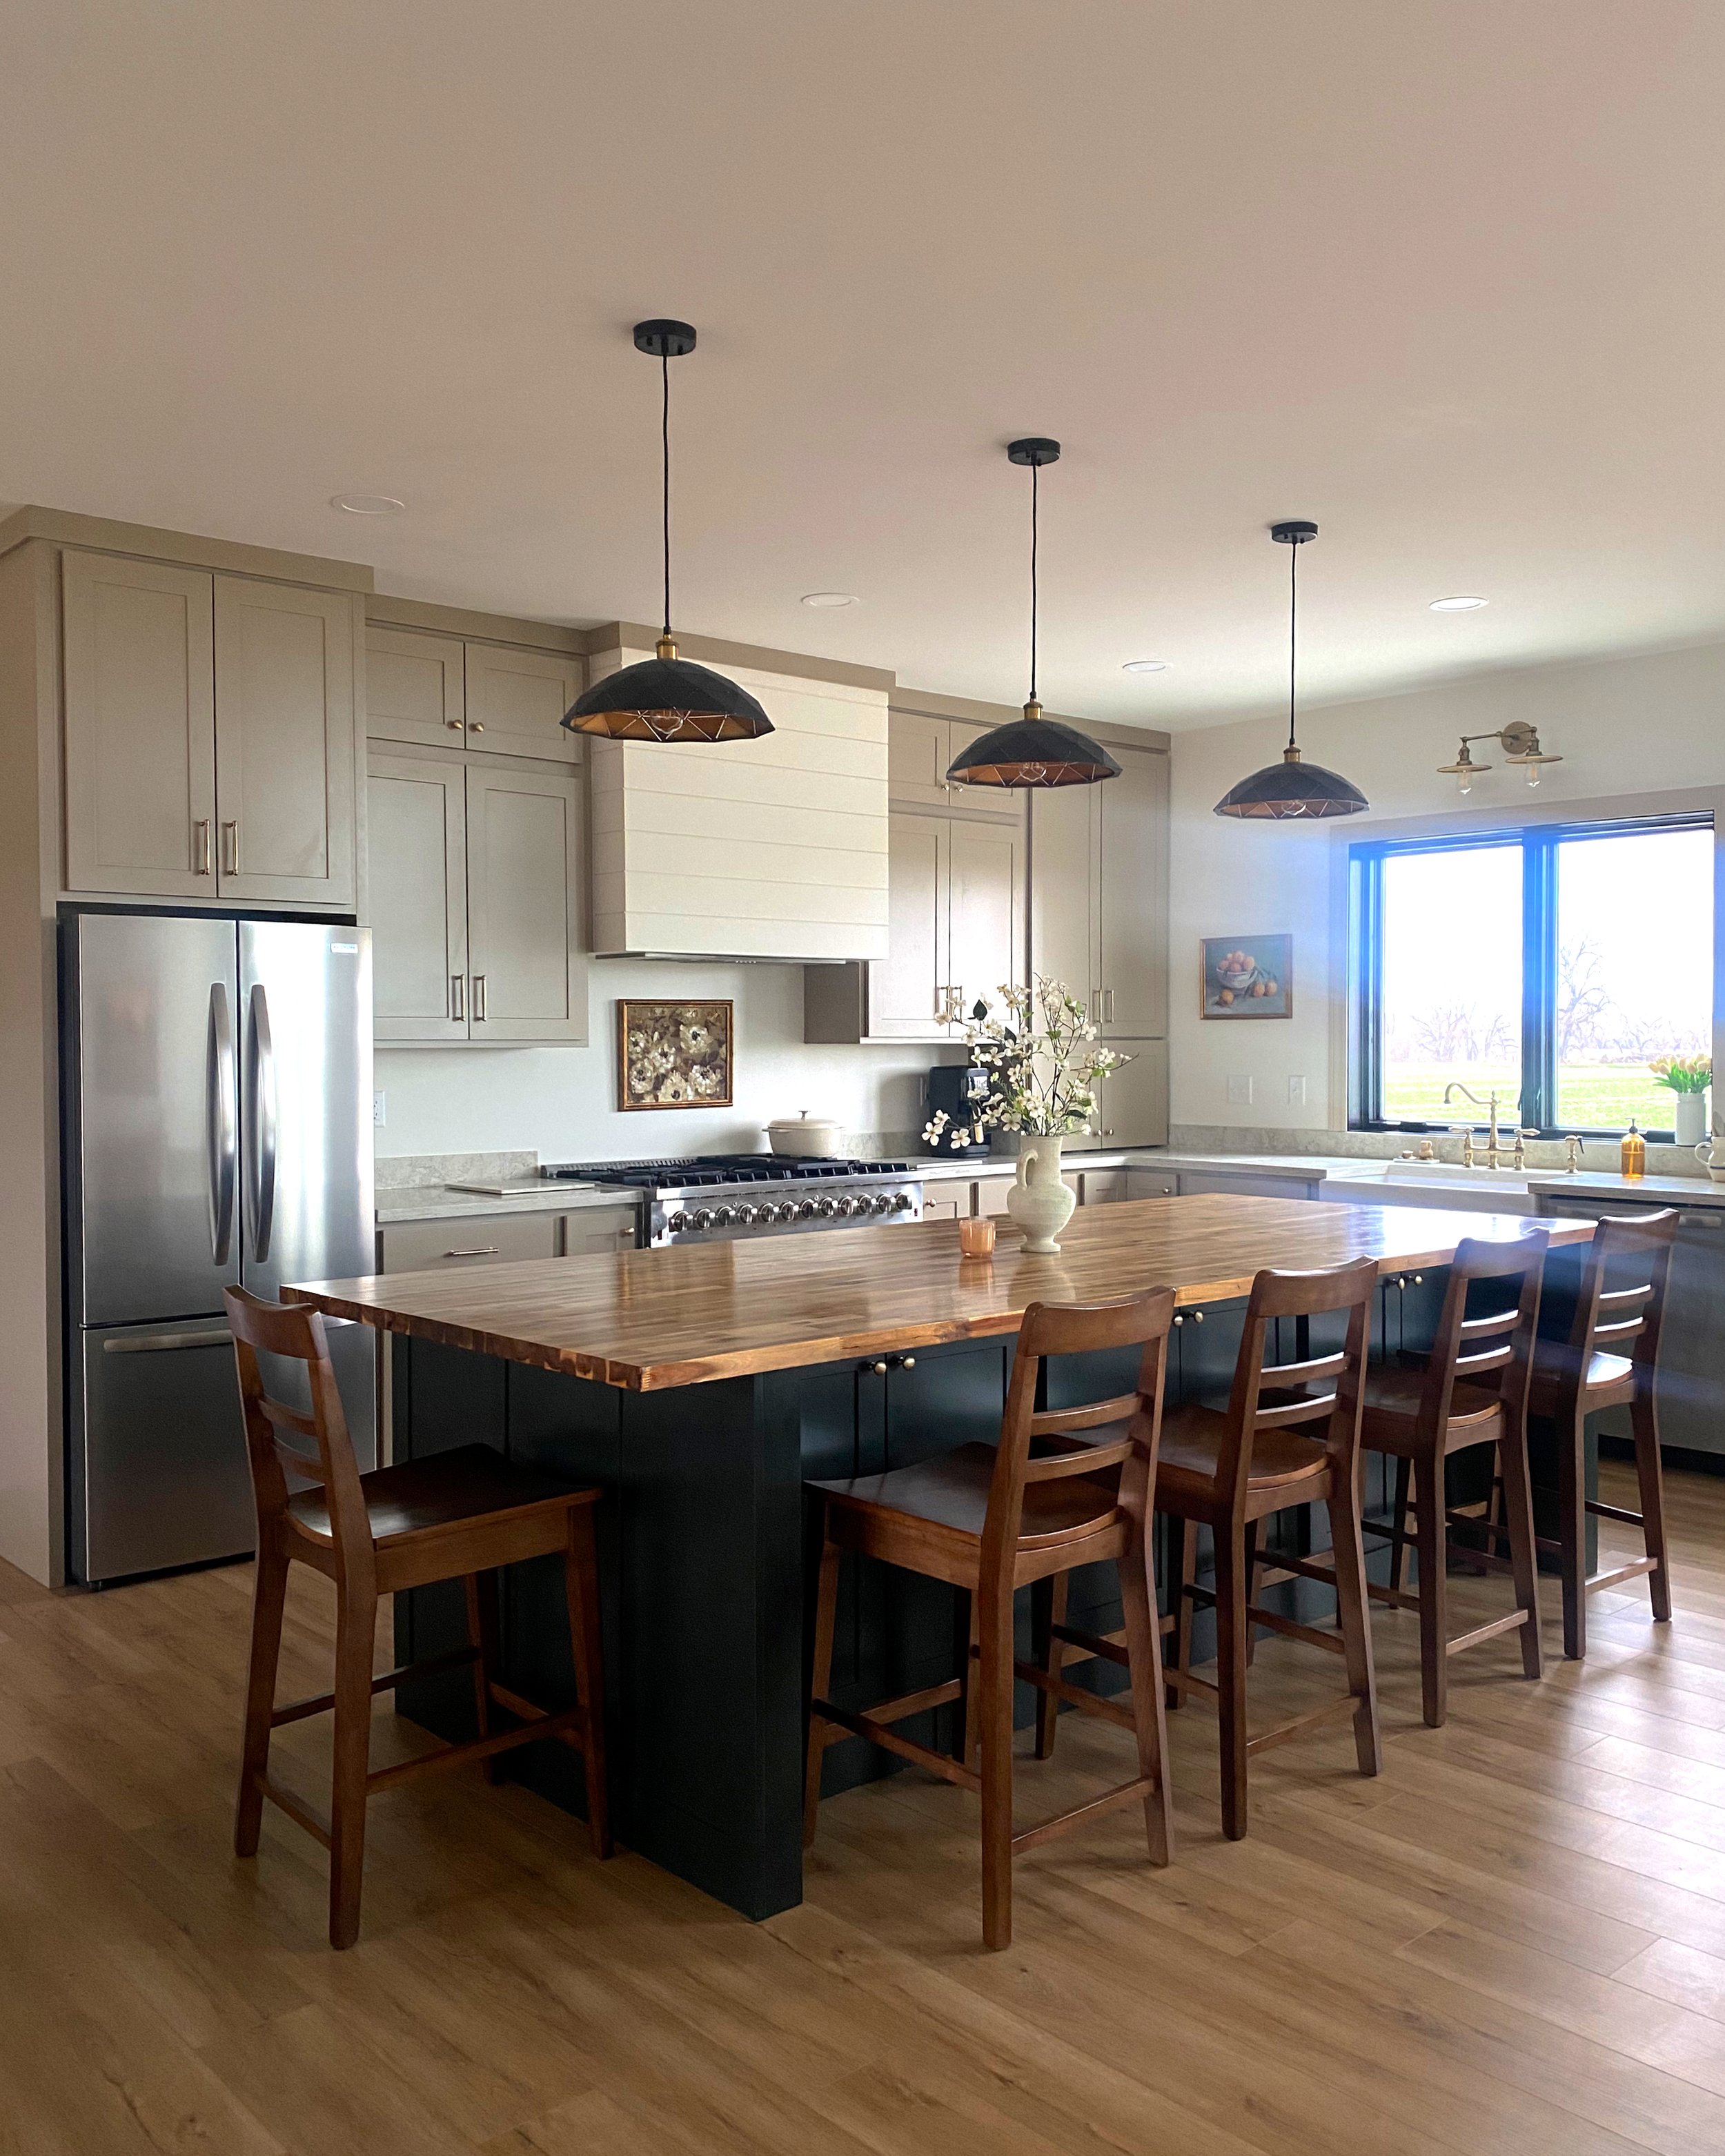
Our Custom Range Hood: A Perfect Blend of Function and Style
When we were planning out our kitchen, one of the most time-consuming decisions I faced was figuring out the range hood. I spent weeks researching, shopping, and pinning ideas, trying to find the perfect option that would complement the kitchen’s design while being practical and affordable. You can easily find beautiful range hoods or even ones that match your range, and there’s always the option to blend the hood with your cabinetry. However, many of these choices were either way over budget or not exactly what I had envisioned for the space.
Through my research, I eventually learned about range hood inserts. These are essentially just the functional part—the vent system—without the decorative exterior. The insert itself is a simple piece that includes the vent, speed buttons, and lights, and the great part is that you can customize the hood around it to suit your style. This discovery opened up a lot more options and allowed us to think about a custom solution that would not only fit our kitchen's aesthetic but also keep costs manageable.
Choosing the Right Size Hood
The biggest decision was figuring out the right size for the vent. I found a helpful tip in my research: the vent should ideally match the size of your range, which makes sense since it’s designed to ventilate the space directly above. Our range is 48 inches, but finding a vent that size turned out to be a bit of a challenge. Knowing that I wouldn't be using all six burners at once, I opted for a slightly smaller 36-inch vent. This works perfectly for us and I’ve never felt like we needed anything bigger. In fact, the 36-inch vent still allows for great airflow, and by choosing it, we were able to plan for a 48-inch custom hood to align with the cooktop and visually balance the space.
The range hood before being painted and before our cabinet and appliance install
After the cabinets and appliances were installed
Building the Custom Hood
Once I had a clearer idea of what I wanted, I worked with our builder to come up with a plan for the custom hood. He suggested building a 4-foot frame around the hood insert, which would create a seamless look while maintaining the right proportions with our stove. Initially, I considered having the frame drywalled, but after some discussion, we decided to use shiplap instead. The shiplap offered a clean look that felt a bit more farmhouse without being to over the top and in line with the overall style of the kitchen.
I opted to paint the shiplap in Sherwin Williams' Alabaster, a beautiful soft white that matches the rest of our walls. I chose a semi-gloss finish because it’s easier to clean—an important factor for something so close to the cooking area. The semi-gloss also adds a subtle sheen that reflects light nicely without being too shiny.
The Finished Look
In the end, I couldn’t be happier with how the range hood turned out. Not only does it add a custom element to the kitchen, but it also breaks up the cabinetry on that wall, creating a focal point around the stove. The shiplap adds just a hint of texture, keeping the look simple but not boring. I love how it frames our Forno stove, making it the true centerpiece of the kitchen.
One of my favorite aspects of this design is that it gives me the flexibility to change up the décor in that area. Whether it’s adding seasonal touches or keeping it minimal, the range hood provides a great backdrop for whatever look I want to create. It's functional, stylish, and personal—everything I wanted in a kitchen upgrade.
Fall farmhouse decor
Decorated for Halloween
All in all, the custom range hood was worth the time and effort, and it’s become one of my favorite features in our kitchen. It’s the perfect blend of function and style, and I love that it’s uniquely ours.


